DIY Printable, Paper Mini Zine Holder
Posted on August 24, 2026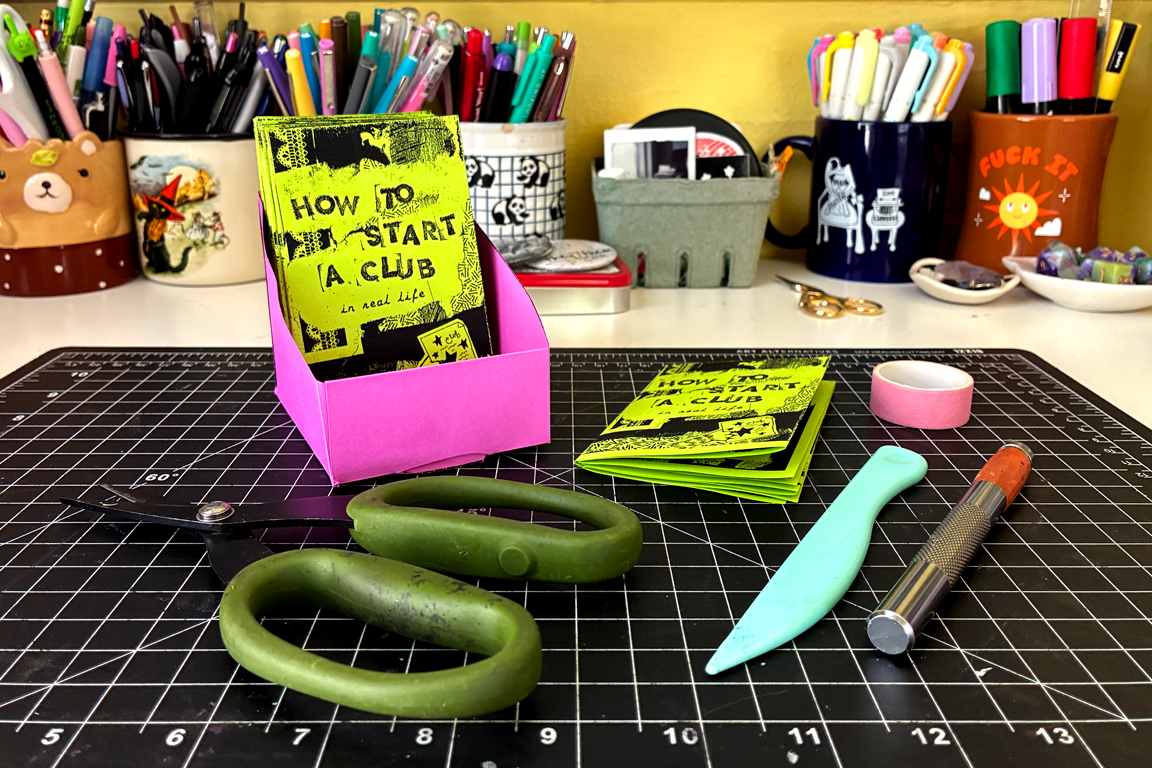
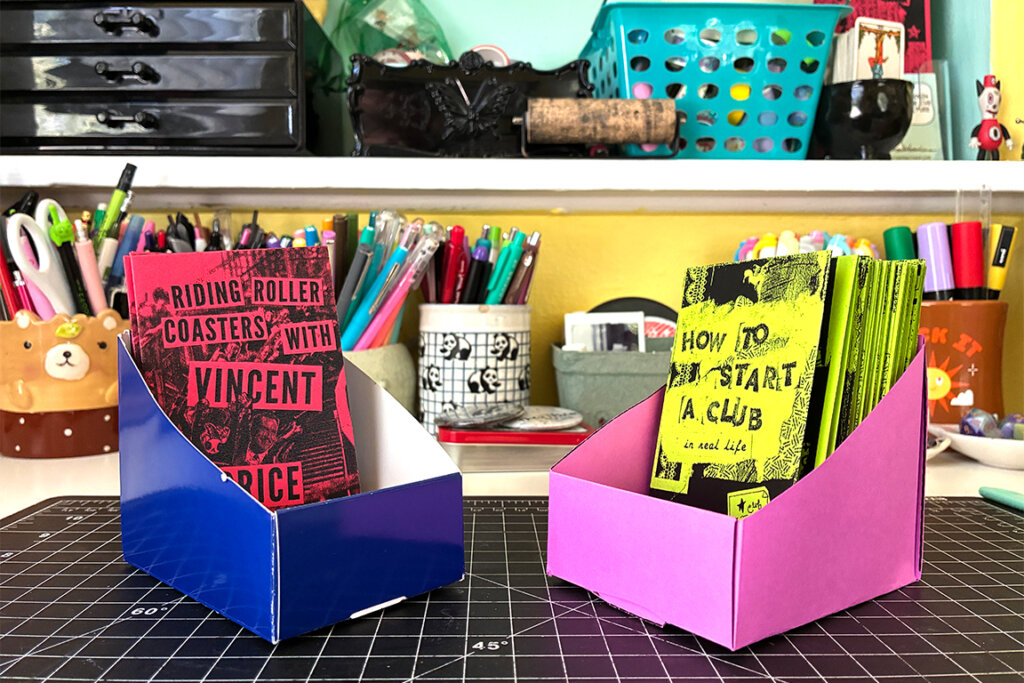
Making your own zine display comes with the added benefit of getting to choose what color paper you craft it from. I love how this pink looks with the lime green zines!
A while back, I bought myself a new watch: an army green Casio Databank with a built-in calculator function. Wearing a watch — a normal watch, one without any “smart” tech or cell phone features — has been a great way for me to kick my doomscrolling habit, as I’d often pick up my phone just to check the time… but then find myself idly scrolling, refreshing Reddit and falling down Wikipedia rabbit holes. We’ve all been there, and if you’re like me, it doesn’t feel great wasting your own time like that. Life is too short to spend your time scrolling the hours away.
But I had a hunch that wearing a watch would mean never picking up the phone in the first place, and that that in turn would lead to less brain rot. And I was right! It’s worked great, my screentime is down, and the watch looks damn cool, to boot.
This is all a long-winded way¹ of getting to the real point of today’s post: a tutorial on making a mini zine holder out of paper from a free printable template, inspired by the watch’s packaging. The Casio arrived in a little blue box, and as I unwrapped it, I thought to myself: “that sure looks like it could hold minizines.” I tested it out and just as I suspected, it was as though the packaging was made just for minis: the box was perfect for displaying zines upright, without blocking the majority of their cover. The zines that I’ve cut-down to make full bleed fit perfectly, but the others — the ones that still had borders — were a bit snug. Nothing a few extra centimeters couldn’t fix, I figured. Because the watch packaging was just folded together, no glue, I could unfold it and make a few modifications and then print copy after copy and have an endless supply of mini zine display cases!
So, as zine fest season approaches and we all prepare to display our wares, I wanted to share the printable with y’all. Feel free to print and fold your own, and then share this with all your mini zine-making friends who could use a cheap, easy way to put their zines on display.
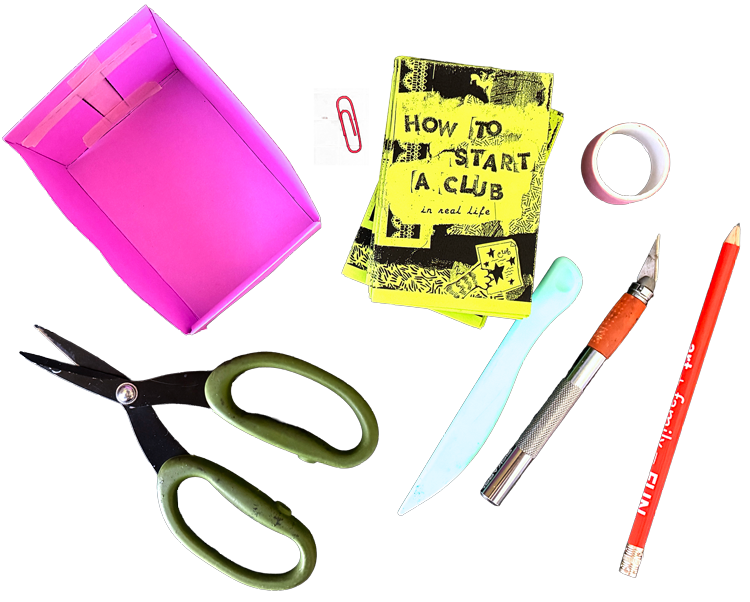
Gather your supplies:
 To start, load your printer with heavier paper or cardstock, and print out one of the following templates:
8.5″ x 11″ template 11″ x 17″ template
Both templates will create the same zine holder, but the 8.5″ x 11″ template is split between two pages.
I recommend printing the template on heavier-weight paper, like cardstock. I haven’t tried making this zine display out of normal, 24lb or 32lb printer paper, but I suspect that the weight of the zines would be too heavy against the paper and lead to crumpling. If you try this with standard paper, lemme know how it goes!
You’ll also need:
Scissors
Washi tape
A paperclip
An exacto-knife
Bone-folder
Step One: Print out the template


Print out the template, then cut it out. You’ll want to cut out the entire shape, and also make cuts on the dashed lines. You can use the exacto-knife to cut out the oval-shape on the interior of the template.
Step Two: Fold it up


Using the bone folder, fold the template along the dotted lines, tucking the “wings” of the box in and over, and folding the paper tab into the oval slot.
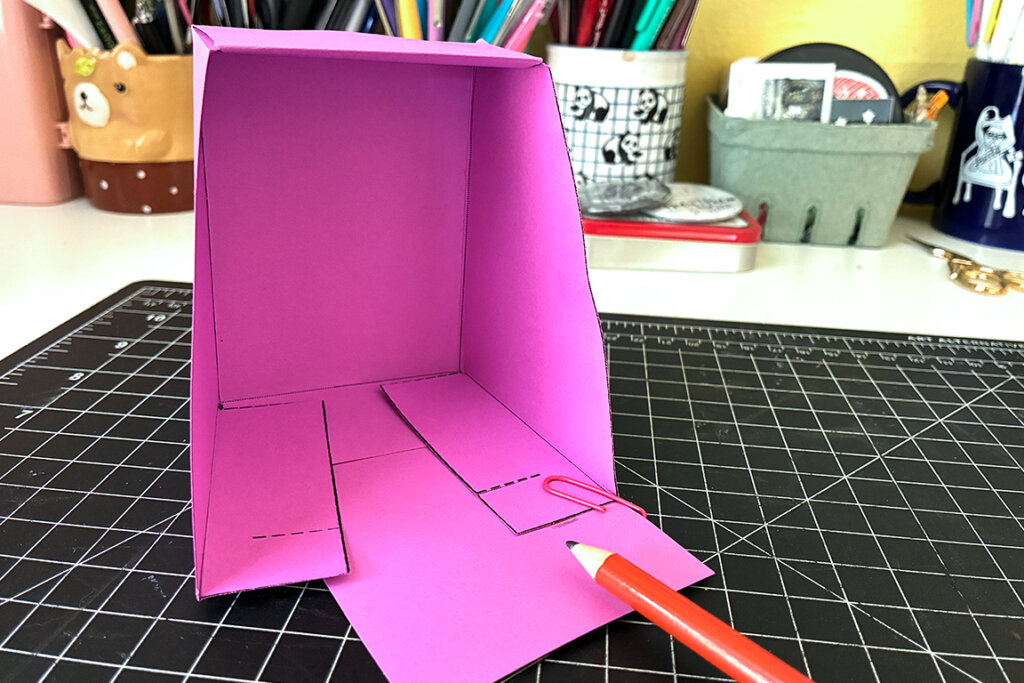
If you’re using the 8.5″ x 11″ template: note that the the box’s back is a separate piece that will slide into the two slits you’ve made along the dashed lines. When you cut the back piece out, it will be slightly longer than the rest of the holder. The shorter end of the back piece will be the part that folds over the rest of the holder and tucks into the slits.
To cut the back to size, I’ve found that using a paper clip to hold the paper to the front of the display is helpful. I simply fold the shorter end at the dotted line, then line up the longer end with the holder (with the shorter end down over the flap on the back), paper clip it, then mark where I will need to cut it with a pencil. Unclip it, and cut off the excess, then slide the back piece in with the shorter end tucked into the slits.


(Optional) Step Three: Reinforce it with tape, and cut off the tail
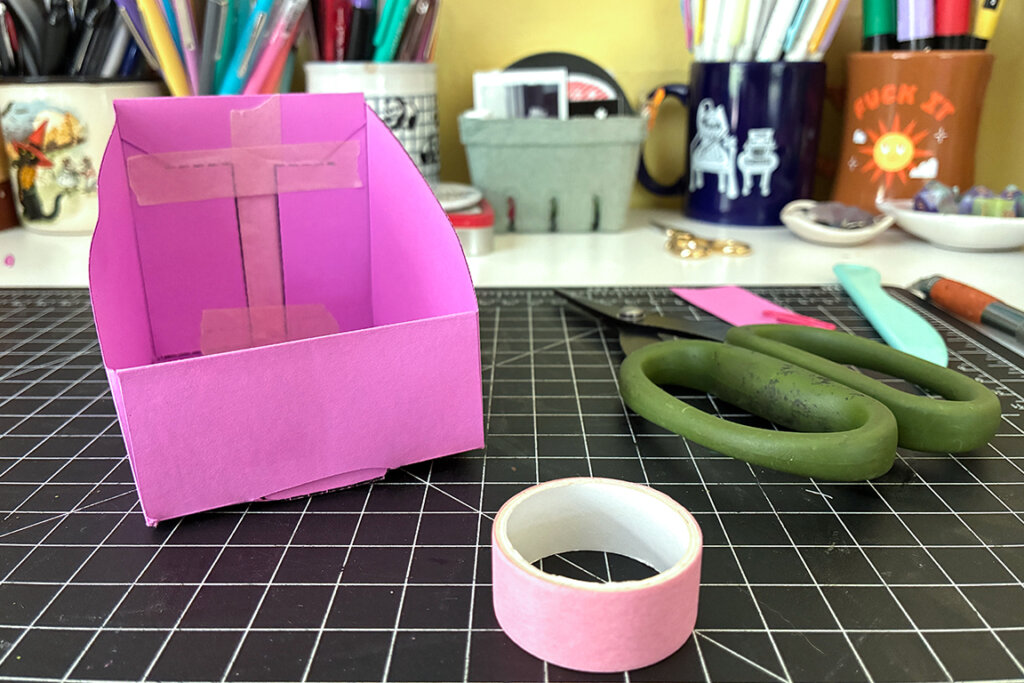


This step only applies if you made the 8.5″ x 11″ version, so it’s optional. You’ll wanna reinforce the back seams with washi tape, ensuring the back of the holder doesn’t become separated from the rest of it. And you’ll want to cut-off the tail — that extra bit of paper on the bottom of the display — where the back meets the front. (Or, leave the tail! You could use it to weigh the holder down with a rock or two if you’re tabling at an outdoor zine fest.)
And that’s it! This little paper display is surprisingly sturdy and super easy to make — photographing and writing out this tutorial is taking way longer than the actual DIY, which came together in a matter of minutes. Now there is nothing stopping you from having a cute way to display your zines on your table, and the options to customize it are endless: you could print a design on the paper, or doodle on it before assembling, or even make it outta a mis-print of the very zine that it’s meant to hold!
Here’s how it looks finished and next to the watch packaging that inspired the whole project, featuring two of my favorite mini zine titles: Riding Roller Coasters with Vincent Price and How to Start a Club IRL.
|
If you found this tutorial inspiring, or gave the DIY a try and made it yourself, then please share this post with your friends and zine community! I don’t utilize social media, and rely on word of mouth (rather than algorithms) to spread the word about what I make here at catmothcrow.com — your shares, comments, and forwards are much appreciated. Thank you! 💗
|
¹ I totally just did that “2010s recipe blog” thing where I told a meandering story before getting to the meat of the post, didn’t I? 🫠


What a great template! This winter I made a giant paper mache zine shelf for zine fest and art markets so I don’t need this right at the moment but I just know this will really come in handy in the near future! Thanks for sharing 🩷
This great, Dayna! Thanks!